Defining capturing area
If you want to capture definite window opened on desktop, you can use the
next technique to define capturing area in Recorder.
Capture single screenshot using the command "Photo screen" from the menu Record.
Then you
should move and resize Bounds Frame
object around the area you want to be captured inside this screenshot.
Now you can delete temporarily captured screen and start the real recording
session.
Capturing in "Low graphics quality" mode
In low graphics mode screenshots will be saved in PNG-8 format.
This leads to less size of generated Flash Movie and presentation project. But PNG-8 has
poor quality of image and, for example, title of window that has the gradient
painting background, will look ugly. To avoid this effect you can
switch off gradient in windows titles before recording a desktop.
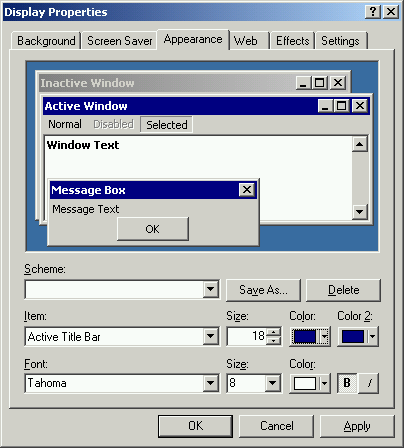
For Windows OS this can be made in "Display Properties" dialog.
This dialog can be opened via
Start button -> Settings -> Control Panel -> Display.
In the dialog you should switch to tab "Appearance", choose Items
"Active Title Bar" / "Inactive Title Bar" and set equal values for "Color" and
"Color 2"properties.

(C) AtPresent Software 2004-2006. All rights reserved.