
You can use Toolbar's navigation buttons to go to next/previous screenshot. Also, you can quickly go to any screen using a slider control.
Navigating between screenshots
Screenshots adding/deleting
Screenshots restoring
Mouse cursor position changing
Mouse clicks adding/removing
Mouse cursor motion path tracing
Screen duration setting
Timeline's frame duration changing
All movie duration changing
Navigating between screenshots
Use navigation commands to look trough all captured screenshots and
make sure if recorded content fits your needs.
Navigate from toolbar
You can use Toolbar's navigation buttons to go to next/previous screenshot.
Also, you can quickly go to any screen using a slider control.
Navigate using timeline
You can go to any screen you want by clicking on the corresponding timeline area.

Information about currently visible screen's ordinal number and all screens count is placed on the toolbar.
 |
- current screen's ordinal number / count of non-deleted screenshots | |
 |
- current screen's number (label on the timeline) / count of all screenshots (including deleted) |
Mouse cursor position changing
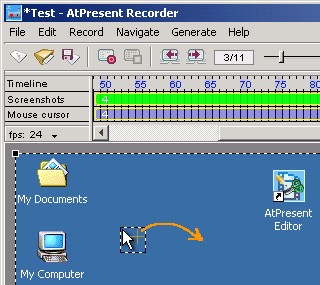
You can correct selected mouse cursor position by mouse Drag and Drop operation
or by pressing keys "Up", "Down", "Left", "Right".
Mouse clicks adding/removing
You can add/remove mouse click/doubleclick by the corresponding buttons on the
Toolbar or using commands
"Add mouse click", "Add double mouse click", "Remove mouse click" from menu Edit.
Also you can change existing single mouse click to double and vice versa.
Mouse click sign is stuck to the final point of mouse motion, so you can change
click location only by changing location of final point.
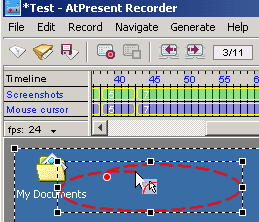
Mouse cursor motion path tracing
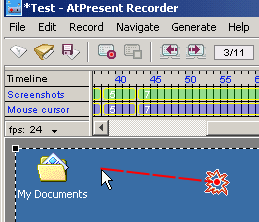
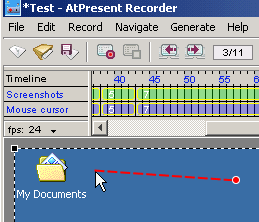
By default Recorder treats mouse motions as linear and non-traceable.
Visually it is shown as a line between starting point of mouse cursor and its final point.
The length of line's dash characterizes the speed of mouse motion.

Screen duration setting
You can define the screen's duration time
using the command "Set screen's duration" from menu Edit
or by clicking the corresponding button on Toolbar.

Timeline's frame duration changing
You can change the duration of timeline's frame by setting the count of frames
per second in the dialog that can be opened by clicking on down arrow image on the
timeline's "fps" panel.
All movie duration changing
To decrease all movie duration use the command "Speed up" from menu Edit
or click the corresponding button on the Toolbar.
This operation leads to increasing of playing speed of generated Flash Movie.
To increase all movie duration use the command "Speed down" from menu Edit
or click the corresponding button on the Toolbar.
This operation leads to decreasing of playing speed of generated Flash Movie.
(C) AtPresent Software 2004-2006. All rights reserved.
 Return to Contents